---
metadata:
- name: generator
content: Diplodoc Platform v5.57.3
alternate:
- https://boost.yandex.ru/doc/en/ad-monetization/dev/flutter7/interstitial.md
- https://boost.yandex.ru/doc/ru/ad-monetization/dev/flutter7/interstitial.md
- href: en/ad-monetization/dev/flutter7/interstitial.md
type: text/markdown
title: Markdown version
- href: llms.txt
type: text/markdown
title: llms.txt
---
> **Documentation Index:** Fetch the complete configuration index at https://boost.yandex.ru/doc/en/llms.txt
# Interstitial ads
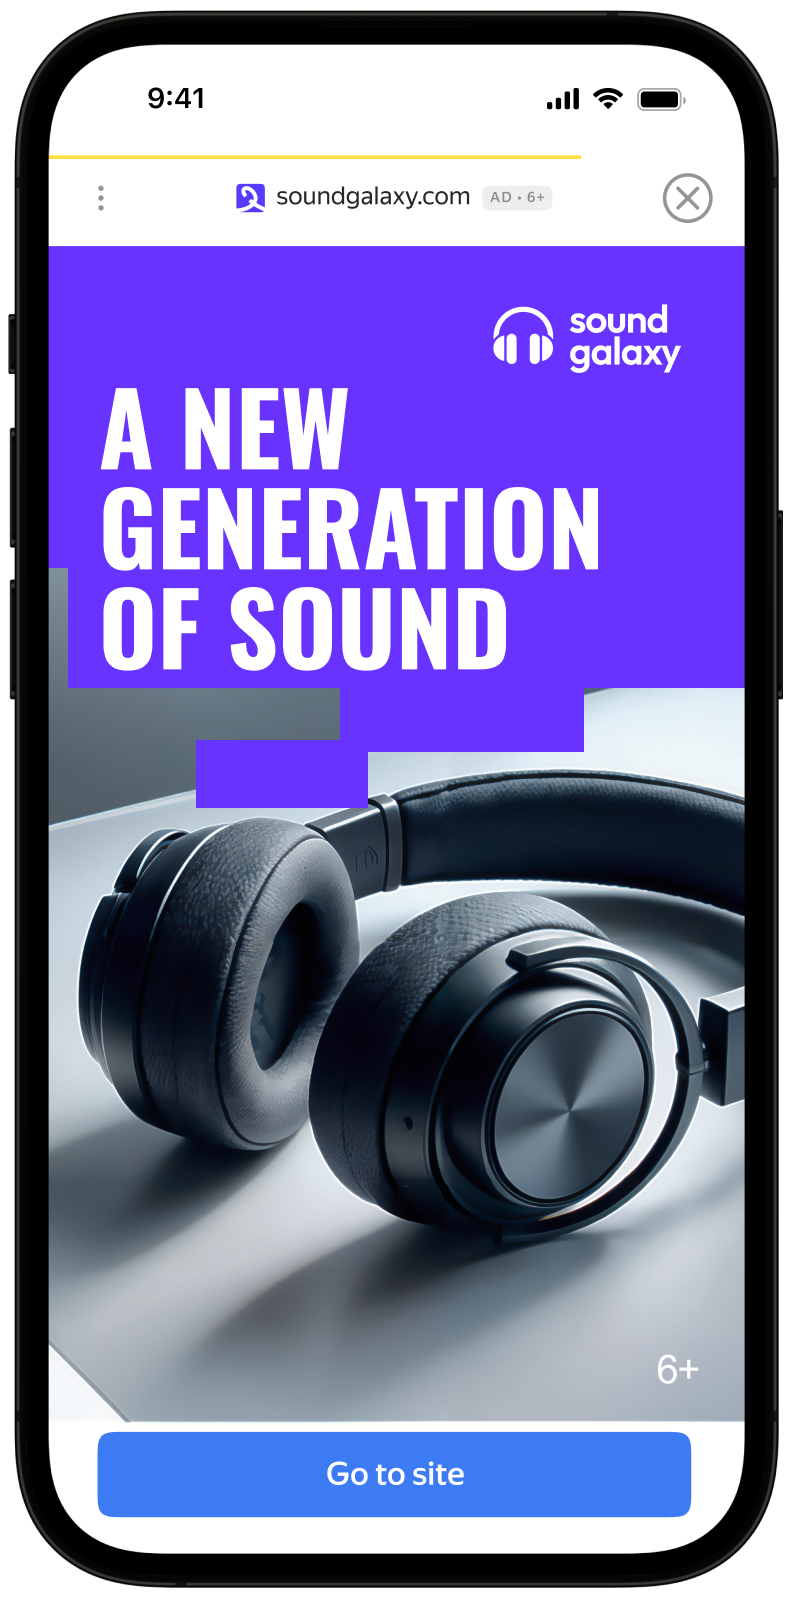
Interstitial advertising is a full-screen ad format embedded within the app content during natural pauses, such as transitioning between game levels or completing a target action.
When an app displays an interstitial ad, the user can either click through to the advertiser's site or close the ad and return to the app.
During interstitial ad impressions, the user's attention is fully focused on the ad, which results in a higher cost for such impressions.
{% cut "Appearance" %}
 {% endcut %}
This guide will show you how to integrate interstitial ads into a Flutter app.
Besides code samples and instructions, it also contains format-specific recommendations and links to additional resources.
## Prerequisite {#pre}
1. Follow the Yandex Mobile Ads Flutter plugin integration steps described under [Quick start](https://boost.yandex.ru/doc/en/ad-monetization/dev/flutter7/quick-start.md).
2. Make sure that you have the [latest version of the Yandex Mobile Ads Flutter plugin](https://boost.yandex.ru/doc/en/ad-monetization/dev/platforms.md). If you're using mediation, update to the most recent [single build version](https://boost.yandex.ru/doc/en/ad-monetization/dev/platforms.md).
## Implementation {#implement}
Key steps for integrating interstitial ads:
* Create and configure the `InterstitialAdLoader` ad loader.
* Load the `InterstitialAd` object.
* Register the `InterstitialAdEventListener` listener for ad callback methods.
* Display the `InterstitialAd` object.
## Features of interstitial ad integration {#features}
If the `onAdFailedToLoad()` callback returns an error, don't try to load a new ad again. If there's no other option, limit the number of ad load retries. This will help avoid constant unsuccessful requests and connection issues if there are limitations.
## Loading ads
To upload interstitial ads, create and set up the `InterstitialAdLoader` object.
Call the `InterstitialAdLoader.create(onAdLoaded, onAdFailedToLoad)` method and pass to it the loader callback listeners.
You will need the ad unit ID (adUnitId) obtained from the Boost interface.
You can expand the set of ad request parameters via `AdRequestConfiguration()`, passing user interests, contextual app data, location details, or other data in the constructor. Adding extra context to ad requests can greatly improve ad relevance. To learn more, see [Ad targeting](https://boost.yandex.ru/doc/en/ad-monetization/dev/flutter7/target.md).
The example below shows how to load an interstitial ad:
```dart
late final Future _adLoader;
InterstitialAd? _ad;
@override
void initState() {
super.initState();
MobileAds.initialize();
_adLoader = _createInterstitialAdLoader();
_loadInterstitialAd();
}
Future _createInterstitialAdLoader() {
return InterstitialAdLoader.create(
onAdLoaded: (InterstitialAd interstitialAd) {
// The ad was loaded successfully. Now you can show loaded ad
_ad = interstitialAd;
},
onAdFailedToLoad: (error) {
// Ad failed to load with AdRequestError.
// Attempting to load a new ad from the onAdFailedToLoad() method is strongly discouraged.
},
);
}
Future _loadInterstitialAd() async {
final adLoader = await _adLoader;
await adLoader.loadAd(adRequestConfiguration: AdRequestConfiguration(adUnitId: 'R-M-XXXXXX-Y')); // for debug you can use 'demo-interstitial-yandex'
}
```
## Displaying ads
Interstitial ads should be displayed during natural pauses in the app's usage. A good example of this would be impressions between game levels or when a user completes an action, such as downloading a file.
To track the interstitial ad lifecycle, set the `InterstitialAdEventListener` callback method listener for the `InterstitialAd` object.
To show an interstitial ad, use the `show()` method. Use the `waitForDismiss()` method to wait until the end of the view:
```dart
_showAd() async {
_ad?.setAdEventListener(
eventListener: InterstitialAdEventListener(
onAdShown: () {
// Called when ad is shown.
},
onAdFailedToShow: (error) {
// Called when an InterstitialAd failed to show.
// Destroy the ad so you don't show the ad a second time.
_ad?.destroy();
_ad = null;
// Now you can preload the next interstitial ad.
_loadInterstitialAd();
},
onAdClicked: () {
// Called when a click is recorded for an ad.
},
onAdDismissed: () {
// Called when ad is dismissed.
// Destroy the ad so you don't show the ad a second time.
_ad?.destroy();
_ad = null;
// Now you can preload the next interstitial ad.
_loadInterstitialAd();
},
onAdImpression: (impressionData) {
// Called when an impression is recorded for an ad.
},
));
await _ad?.show();
await _ad?.waitForDismiss();
}
```
## Releasing resources
Call the `destroy()` method for previously shown ads. That releases the resources and prevents memory leaks.
Don't store links to previously rendered ads.
You can use the `onAdDismissed` callback method for the following actions:
```dart
_ad?.setAdEventListener(
eventListener: InterstitialAdEventListener(
//...
onAdDismissed: () {
_ad?.destroy();
_ad = null;
},
//...
));
```
## Testing interstitial ad integration {#test}
{% list tabs %}
- Android
### Using demo ad units for ad testing {#demo-blocks}
We recommend using test ads to test your interstitial ad integration and your app itself.
To make sure that test ads are returned for each ad request, we created a special demo ad placement ID designed to help you test your ad integration.
Demo adUnitId: `demo-interstitial-yandex`.
{% note warning %}
Before publishing your app in the store, make sure to replace the demo placement ID with the real ID you obtained in the interface Boost.
{% endnote %}
For the list of all available demo ad placement IDs, see [Demo ad units for testing](https://boost.yandex.ru/doc/en/ad-monetization/dev/android7/demo-blocks.md).
### Testing ad integration {#test-int}
You can check your interstitial ad integration using the SDK's built-in analyzer.
The tool makes sure your interstitial ads are integrated properly and outputs a detailed report to the log.
To view the report, search the keyword “YandexAds” in [Logcat](https://developer.android.com/studio/command-line/logcat), a tool for debugging Android apps.
```bash
adb logcat -v brief '*:S YandexAds'
```
If the integration is successful, the following message is returned:
```bash
adb logcat -v brief '*:S YandexAds'
mobileads$ adb logcat -v brief '*:S YandexAds'
I/YandexAds(13719): [Integration] Ad type interstitial was integrated successfully
```
If you're having problems integrating interstitial ads, you'll get a detailed report on the issues and recommendations for how to fix them.
- iOS
### Using demo ad units for ad testing
We recommend using test ads to test your ad integration and your app itself.
To make sure that test ads are returned for each ad request, we created a special demo ad placement ID designed to help you test your ad integration.
Demo adUnitId: `demo-interstitial-yandex`.
{% note warning %}
Before publishing your app in the store, make sure to replace the demo placement ID with the real ID you obtained in the interface Boost.
{% endnote %}
For the list of all available demo ad placement IDs, see [Demo ad units for testing](https://boost.yandex.ru/doc/en/ad-monetization/dev/ios7/demo-blocks.md).
### Testing ad integration
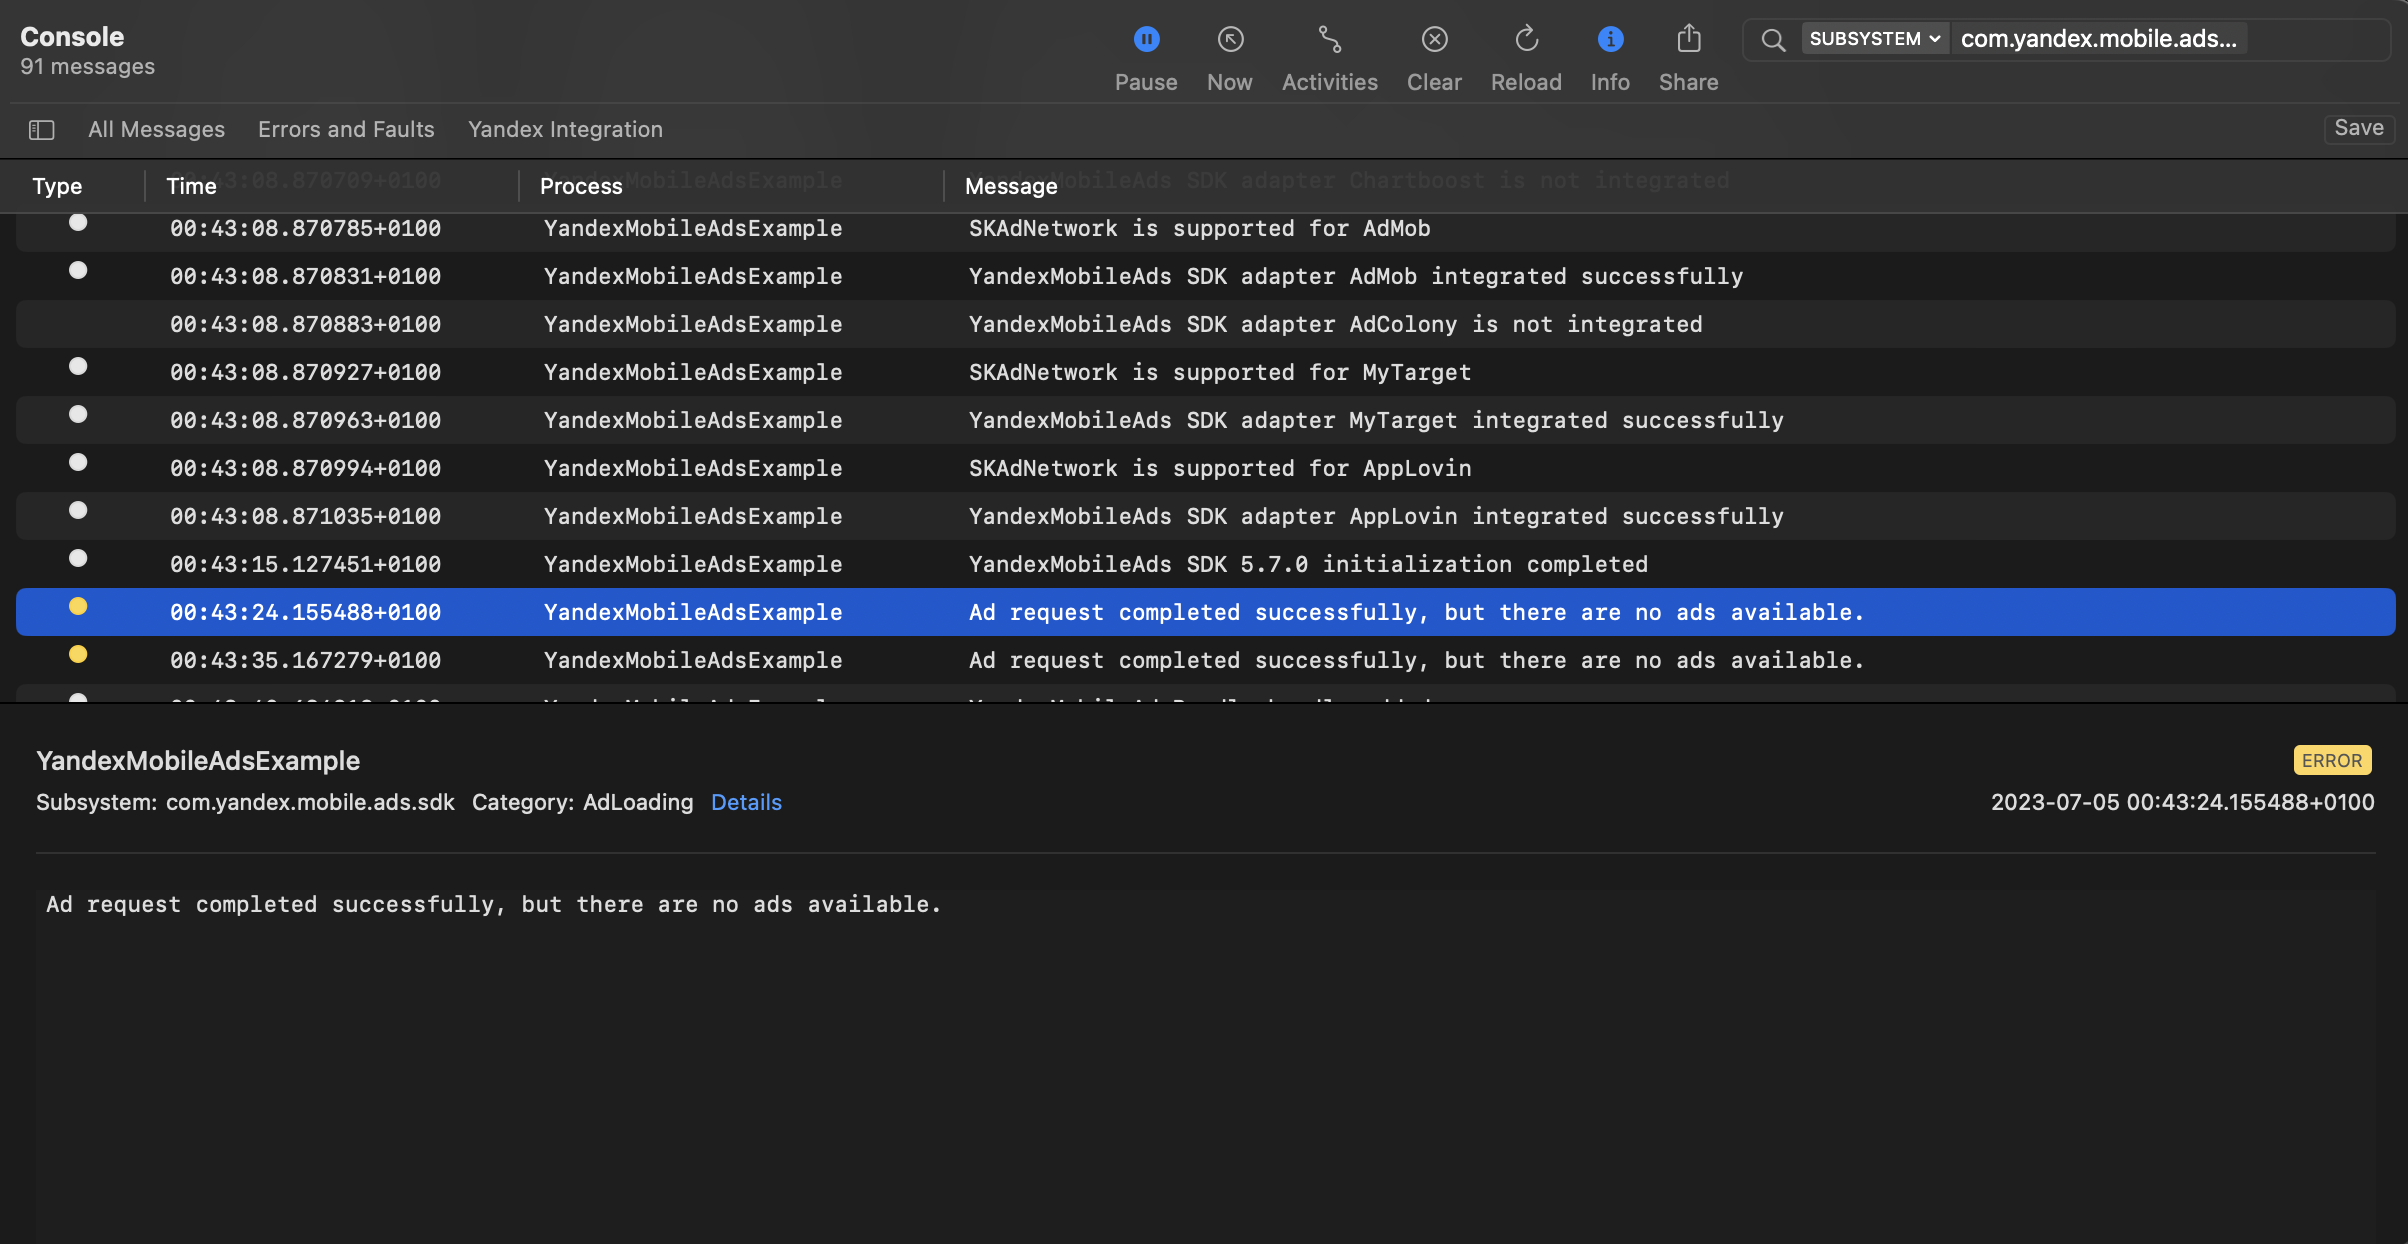
You can test your ad integration using the native Console tool.
To view detailed logs, call the `MobileAds` class's `enableLogging` method.
```swift
MobileAds.enableLogging()
```
To view SDK logs, go to the Console tool and set `Subsystem = com.mobile.ads.ads.sdk`. You can also filter logs by category and error level.
If you're having problems integrating ads, you'll get a detailed report on the issues and recommendations for how to fix them.
{% endcut %}
This guide will show you how to integrate interstitial ads into a Flutter app.
Besides code samples and instructions, it also contains format-specific recommendations and links to additional resources.
## Prerequisite {#pre}
1. Follow the Yandex Mobile Ads Flutter plugin integration steps described under [Quick start](https://boost.yandex.ru/doc/en/ad-monetization/dev/flutter7/quick-start.md).
2. Make sure that you have the [latest version of the Yandex Mobile Ads Flutter plugin](https://boost.yandex.ru/doc/en/ad-monetization/dev/platforms.md). If you're using mediation, update to the most recent [single build version](https://boost.yandex.ru/doc/en/ad-monetization/dev/platforms.md).
## Implementation {#implement}
Key steps for integrating interstitial ads:
* Create and configure the `InterstitialAdLoader` ad loader.
* Load the `InterstitialAd` object.
* Register the `InterstitialAdEventListener` listener for ad callback methods.
* Display the `InterstitialAd` object.
## Features of interstitial ad integration {#features}
If the `onAdFailedToLoad()` callback returns an error, don't try to load a new ad again. If there's no other option, limit the number of ad load retries. This will help avoid constant unsuccessful requests and connection issues if there are limitations.
## Loading ads
To upload interstitial ads, create and set up the `InterstitialAdLoader` object.
Call the `InterstitialAdLoader.create(onAdLoaded, onAdFailedToLoad)` method and pass to it the loader callback listeners.
You will need the ad unit ID (adUnitId) obtained from the Boost interface.
You can expand the set of ad request parameters via `AdRequestConfiguration()`, passing user interests, contextual app data, location details, or other data in the constructor. Adding extra context to ad requests can greatly improve ad relevance. To learn more, see [Ad targeting](https://boost.yandex.ru/doc/en/ad-monetization/dev/flutter7/target.md).
The example below shows how to load an interstitial ad:
```dart
late final Future _adLoader;
InterstitialAd? _ad;
@override
void initState() {
super.initState();
MobileAds.initialize();
_adLoader = _createInterstitialAdLoader();
_loadInterstitialAd();
}
Future _createInterstitialAdLoader() {
return InterstitialAdLoader.create(
onAdLoaded: (InterstitialAd interstitialAd) {
// The ad was loaded successfully. Now you can show loaded ad
_ad = interstitialAd;
},
onAdFailedToLoad: (error) {
// Ad failed to load with AdRequestError.
// Attempting to load a new ad from the onAdFailedToLoad() method is strongly discouraged.
},
);
}
Future _loadInterstitialAd() async {
final adLoader = await _adLoader;
await adLoader.loadAd(adRequestConfiguration: AdRequestConfiguration(adUnitId: 'R-M-XXXXXX-Y')); // for debug you can use 'demo-interstitial-yandex'
}
```
## Displaying ads
Interstitial ads should be displayed during natural pauses in the app's usage. A good example of this would be impressions between game levels or when a user completes an action, such as downloading a file.
To track the interstitial ad lifecycle, set the `InterstitialAdEventListener` callback method listener for the `InterstitialAd` object.
To show an interstitial ad, use the `show()` method. Use the `waitForDismiss()` method to wait until the end of the view:
```dart
_showAd() async {
_ad?.setAdEventListener(
eventListener: InterstitialAdEventListener(
onAdShown: () {
// Called when ad is shown.
},
onAdFailedToShow: (error) {
// Called when an InterstitialAd failed to show.
// Destroy the ad so you don't show the ad a second time.
_ad?.destroy();
_ad = null;
// Now you can preload the next interstitial ad.
_loadInterstitialAd();
},
onAdClicked: () {
// Called when a click is recorded for an ad.
},
onAdDismissed: () {
// Called when ad is dismissed.
// Destroy the ad so you don't show the ad a second time.
_ad?.destroy();
_ad = null;
// Now you can preload the next interstitial ad.
_loadInterstitialAd();
},
onAdImpression: (impressionData) {
// Called when an impression is recorded for an ad.
},
));
await _ad?.show();
await _ad?.waitForDismiss();
}
```
## Releasing resources
Call the `destroy()` method for previously shown ads. That releases the resources and prevents memory leaks.
Don't store links to previously rendered ads.
You can use the `onAdDismissed` callback method for the following actions:
```dart
_ad?.setAdEventListener(
eventListener: InterstitialAdEventListener(
//...
onAdDismissed: () {
_ad?.destroy();
_ad = null;
},
//...
));
```
## Testing interstitial ad integration {#test}
{% list tabs %}
- Android
### Using demo ad units for ad testing {#demo-blocks}
We recommend using test ads to test your interstitial ad integration and your app itself.
To make sure that test ads are returned for each ad request, we created a special demo ad placement ID designed to help you test your ad integration.
Demo adUnitId: `demo-interstitial-yandex`.
{% note warning %}
Before publishing your app in the store, make sure to replace the demo placement ID with the real ID you obtained in the interface Boost.
{% endnote %}
For the list of all available demo ad placement IDs, see [Demo ad units for testing](https://boost.yandex.ru/doc/en/ad-monetization/dev/android7/demo-blocks.md).
### Testing ad integration {#test-int}
You can check your interstitial ad integration using the SDK's built-in analyzer.
The tool makes sure your interstitial ads are integrated properly and outputs a detailed report to the log.
To view the report, search the keyword “YandexAds” in [Logcat](https://developer.android.com/studio/command-line/logcat), a tool for debugging Android apps.
```bash
adb logcat -v brief '*:S YandexAds'
```
If the integration is successful, the following message is returned:
```bash
adb logcat -v brief '*:S YandexAds'
mobileads$ adb logcat -v brief '*:S YandexAds'
I/YandexAds(13719): [Integration] Ad type interstitial was integrated successfully
```
If you're having problems integrating interstitial ads, you'll get a detailed report on the issues and recommendations for how to fix them.
- iOS
### Using demo ad units for ad testing
We recommend using test ads to test your ad integration and your app itself.
To make sure that test ads are returned for each ad request, we created a special demo ad placement ID designed to help you test your ad integration.
Demo adUnitId: `demo-interstitial-yandex`.
{% note warning %}
Before publishing your app in the store, make sure to replace the demo placement ID with the real ID you obtained in the interface Boost.
{% endnote %}
For the list of all available demo ad placement IDs, see [Demo ad units for testing](https://boost.yandex.ru/doc/en/ad-monetization/dev/ios7/demo-blocks.md).
### Testing ad integration
You can test your ad integration using the native Console tool.
To view detailed logs, call the `MobileAds` class's `enableLogging` method.
```swift
MobileAds.enableLogging()
```
To view SDK logs, go to the Console tool and set `Subsystem = com.mobile.ads.ads.sdk`. You can also filter logs by category and error level.
If you're having problems integrating ads, you'll get a detailed report on the issues and recommendations for how to fix them.
 {% endlist %}
## Tips
### Ad preloading
Loading an ad may take several seconds, depending on the number of ad networks connected in Mobile Mediation and the user's internet speed. We recommend preloading ads before displaying them.
Call `load` in advance to display the loaded ad at the right moment.
To begin preloading the next ad immediately after serving the current one, you can link this process to the `onAdDismissed()` event.
If you cache ads on too many screens that are unlikely to be shown, your ad effectiveness could drop. For example, if users complete 2-3 game levels per session, you shouldn't cache ads for 6-7 screens. Your ad viewability could decrease otherwise, and the advertising system might deprioritize your app.
To ensure caching benefits your app, monitor the “Show rate” or “View rate” metrics in the Boost interface. If it's under 20%, you should probably revise your caching algorithm. The higher the percentage of impressions, the better.
## Additional resources {#resources}
*
Link to [pub.dev](https://pub.dev/packages/yandex_mobileads/example).
{% endlist %}
## Tips
### Ad preloading
Loading an ad may take several seconds, depending on the number of ad networks connected in Mobile Mediation and the user's internet speed. We recommend preloading ads before displaying them.
Call `load` in advance to display the loaded ad at the right moment.
To begin preloading the next ad immediately after serving the current one, you can link this process to the `onAdDismissed()` event.
If you cache ads on too many screens that are unlikely to be shown, your ad effectiveness could drop. For example, if users complete 2-3 game levels per session, you shouldn't cache ads for 6-7 screens. Your ad viewability could decrease otherwise, and the advertising system might deprioritize your app.
To ensure caching benefits your app, monitor the “Show rate” or “View rate” metrics in the Boost interface. If it's under 20%, you should probably revise your caching algorithm. The higher the percentage of impressions, the better.
## Additional resources {#resources}
*
Link to [pub.dev](https://pub.dev/packages/yandex_mobileads/example).